How to Use Hootsuite Step-by-Step
Introduction
Hootsuite is one of the most powerful social media management tools available today. However, many beginners feel overwhelmed when they first open the dashboard. This step-by-step guide will walk you through using Hootsuite from initial setup to advanced workflows, ensuring you use the platform efficiently and professionally.
Step 1: Create Your Hootsuite Account
Start by visiting the official Hootsuite website and creating an account. You can sign up using an email address or connect through Google.
- Choose a plan (Free trial recommended)
- Verify your email
- Access the Hootsuite dashboard
Once logged in, you will be guided through a short onboarding process that introduces basic features.
Step 2: Connect Your Social Media Accounts
The next step is linking your social media profiles. Hootsuite allows you to manage multiple platforms from one place.
- Go to My Profile → Social Accounts
- Select the platform (Facebook, Instagram, X, LinkedIn, etc.)
- Authorize access
After connecting accounts, you will see them listed and ready to manage inside the dashboard.
Step 3: Understanding the Hootsuite Dashboard
The dashboard is the heart of Hootsuite. It is divided into streams that display real-time updates from your social accounts.
- Home: Overview of activity
- Streams: Mentions, messages, hashtags
- Planner: Scheduled content calendar
- Analytics: Performance metrics
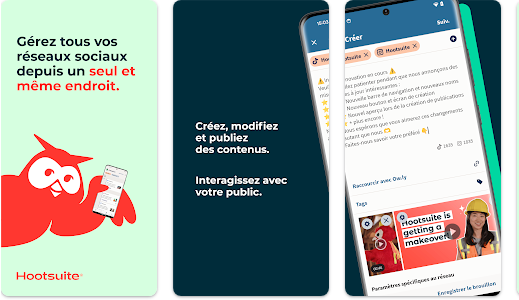
Step 4: Creating and Scheduling Posts
Scheduling posts is one of Hootsuite’s strongest features. It helps maintain consistent posting without manual effort.
- Click Create
- Select social accounts
- Add text, links, or media
- Choose date and time
You can also use the auto-schedule option, where Hootsuite selects the best posting time based on engagement data.
Step 5: Using the Content Planner
The Planner provides a calendar view of all scheduled and published posts. This helps visualize your content strategy.
- Edit scheduled posts
- Reschedule campaigns
- Ensure content balance
Step 6: Monitoring Conversations & Messages
Hootsuite enables real-time monitoring of social interactions.
- Reply to comments
- Respond to direct messages
- Track mentions and hashtags
This is especially useful for customer support and brand reputation management.
Step 7: Analytics and Performance Tracking
Analytics help you understand what works and what doesn’t. Hootsuite provides detailed insights.
| Metric | Purpose | Benefit |
|---|---|---|
| Engagement Rate | Measure interaction | Improve content quality |
| Reach | Audience visibility | Optimize posting time |
| Clicks | Traffic tracking | Increase conversions |
| Follower Growth | Audience expansion | Brand awareness |
Step 8: Team Collaboration & Permissions
For teams, Hootsuite allows controlled collaboration.
- Assign roles (Admin, Editor, Analyst)
- Approve content before publishing
- Track team activity
This reduces errors and maintains brand consistency.
Step 9: Automations & Integrations
Hootsuite integrates with tools like Canva, Google Drive, and CRM systems. Automation saves time and improves workflows.
Common Beginner Mistakes
- Scheduling without reviewing content
- Ignoring analytics
- Posting identical content on all platforms
- Over-automation with no engagement
Best Practices for Long-Term Success
Successful users treat Hootsuite as a strategic tool rather than just a scheduler. Regular analysis, creative testing, and audience interaction are essential.